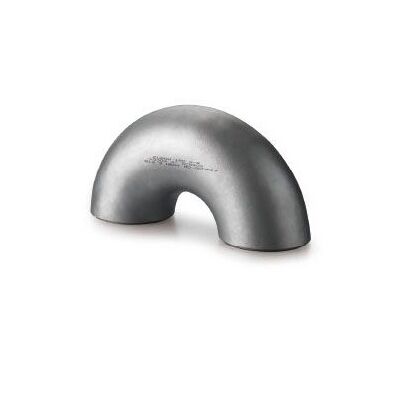
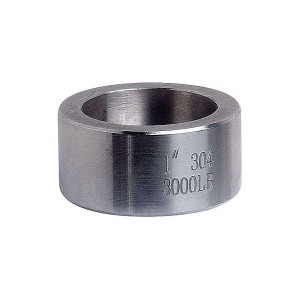
Steel Butt Welding Pipe Fittings 180 Degree Elbow
180 Degree Elbow
Material: Carbon Steel, Stainless Steel, Alloy Steel
Technical: Forged and pushing
Connection: Welding
Standard: ANSI, ASME,AP15L,DIN,JIS,BS,GB
Type: 45°and 90°LR/SR Elbow, Reducers, Tee, Bends, Cap, Cross.
Wall Thickness: SCH5-SCH160 XS XXS STD
Surface: Black Paint/Rust-proof Oil/Hot Dipped Galvanized
Angles: 30/45/60/90/180°
Size: 1/2”-80”/DN15-DN2000
Certificate: ISO -9001:2000, API, CCS
Application: Chemical Industry, Petroleum Industry, Construction Industry and Other
Inspection: Factory In-House Check or The Third Party Inspection
Packing: Plywood Pallets/ Wooden Case Or As Per your Specification
Technical Requirement
1. Since most of the pipe fittings are used for welding, in order to improve the welding quality, the ends are turned into grooves, with a certain angle and a certain edge. This requirement is also strict. There are regulations on the thickness of the edge, the angle and the deviation range. The surface quality and mechanical properties are basically the same as those of pipes. For the convenience of welding, the steel grade of pipe fittings and connected pipes is the same.
2. That is, all pipe fittings shall be subject to surface treatment, and the iron oxide scale on the internal and external surfaces shall be sprayed off by shot peening, and then coated with anti-corrosion paint. This is for export needs. Moreover, this work should be done at home to facilitate transportation and prevent corrosion and oxidation.
3. It is the requirement for packaging. For small pipe fittings, such as export, wooden boxes need to be made, about 1m3. It is stipulated that the number of elbows in such boxes can not exceed one ton. The standard allows suits, that is, large sets and small sets, but the total weight can not exceed 1 ton. For large pieces y, a single package is required. For 24 ", a single package is required. The other is the packaging mark, which should indicate the size, steel number, batch number, manufacturer's trademark, etc.
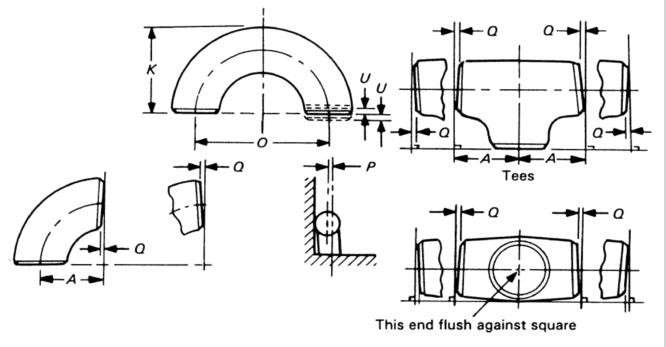
ASME B16.9, B16.28
|
Pipe Size |
All Fittings |
90 & 45 Elbows and Tees |
Reducers and Lap Joint Stub ends |
Caps |
|||||||
|
|
Outside Diameter at Bevel, D (1) |
Inside Diameter at End (1) |
Wall Thickness t |
Center-to-End Dimensions A,B,C,M |
Overall Length, F,H |
|
|||||
|
|
|
|
|
|
|
Overall Length, E |
|||||
|
|
|
|
|
|
|
|
|||||
|
|
IN |
MM |
IN |
MM |
|
IN |
MM |
IN |
MM |
IN |
MM |
|
½ ~ 2½ |
+0.06 |
+1.6 |
±0.03 |
±0.8 |
Not Less Than 87.5% of Nominal Thickness |
±0.06 |
±2 |
±0.06 |
±2 |
±0.12 |
±3 |
|
|
-0.03 |
-0.8 |
|
|
|
|
|
|
|
|
|
|
3 ~ 2½ |
±0.06 |
±1.6 |
±0.06 |
±1.6 |
|
|
|
|
|
|
|
|
4 |
|
|
|
|
|
|
|
|
|
|
|
|
5 ~ 8 |
+0.09 |
+2.4 |
|
|
|
|
|
|
|
±0.25 |
±6 |
|
|
-0.06 |
-1.6 |
|
|
|
|
|
|
|
|
|
|
10 ~ 18 |
+0.16 |
+4.0 |
±0.12 |
±3.2 |
|
±0.09 |
|
±0.09 |
|
|
|
|
|
-0.12 |
-3.2 |
|
|
|
|
|
|
|
|
|
|
20 ~ 24 |
+0.25 -0.19 |
+6.4 -4.8 |
±0.19 |
±4.8 |
|
|
|
|
|
|
|
|
26 ~ 30 |
|
|
|
|
|
±0.12 |
±3 |
±0.19 |
±5 |
±0.38 |
±10 |
|
|
|
|
|
|
|
|
|
|
|
|
|
|
32 ~ 48 |
|
|
|
|
|
±0.19 |
±5 |
|
|
|
|
|
Pipe Size |
Lap Joint Stub Ends (2) |
180 Return Bends |
||||||||||
|
|
Outside Diameter of Lap, G |
Lap Thickness |
Fillet Radius of Lap, R |
Center-to-Center Dimension, O |
Back-to- Face Dimension, K |
Alignment of Ends, U |
||||||
|
|
|
|
|
|
|
|
||||||
|
|
|
|
|
|
|
|
||||||
|
|
IN |
MM |
IN |
MM |
IN |
MM |
IN |
MM |
IN |
MM |
IN |
MM |
|
½ ~ 2½ |
+0 -0.03 |
+0 -1 |
+0.06 -0 |
+1.6 -0 |
+0 -0.03 |
+0 -1 |
±0.25 |
±6 |
±0.25 |
±6 |
±0.03 |
±1 |
|
3 ~ 2½ |
|
|
|
|
|
|
|
|
|
|
|
|
|
4 |
|
|
|
|
+0 -0.06 |
+0 -2 |
|
|
|
|
|
|
|
5 ~ 8 |
|
|
|
|
|
|
|
|
|
|
|
|
|
10 ~ 18 |
+0 -0.06 |
+0 -2 |
+0.12 -0 |
+3.2 -0 |
|
|
±0.38 |
±10 |
|
|
±0.06 |
±2 |
|
20 ~ 24 |
|
|
|
|
|
|
|
|
|
|
|
|
|
Pipe Size |
Off Angle, Q |
Off Plane, P |
||
|
|
IN |
MM |
IN |
MM |
|
½ ~ 4 |
± 0.03 |
± 1 |
± 0.06 |
± 2 |
|
5 ~ 8 |
± 0.06 |
± 2 |
± 0.12 |
± 4 |
|
10 ~ 12 |
± 0.09 |
± 0.19 |
± 5 |
|
|
14 ~ 16 |
± 3 |
± 0.25 |
± 6 |
|
|
18 ~ 24 |
± 0.12 |
± 4 |
± 0.38 |
± 10 |
|
26 ~ 30 |
± 0.19 |
± 5 |
||
|
32 ~ 42 |
± 0.50 |
± 13 |
||
|
44 ~ 48 |
± 0.75 |
± 19 |
||
NOTES:
Out-of-round is the sum of absolute values of plus and minus tolerances.
Outside diameter of barrel see the table on page 15.

